這裡介紹如何開啟 Bluehost 網頁主機空間的 SSH 登入功能,並設定使用公鑰登入。
Bluehost 的 shared hosting 入門方案有提供使用者以 SSH 登入主機管理檔案的功能,對於熟悉 Linux 指令的使用者來說,有這個功能可以使用在管理上會方便很多。
開啟 SSH 登入功能
Step 1
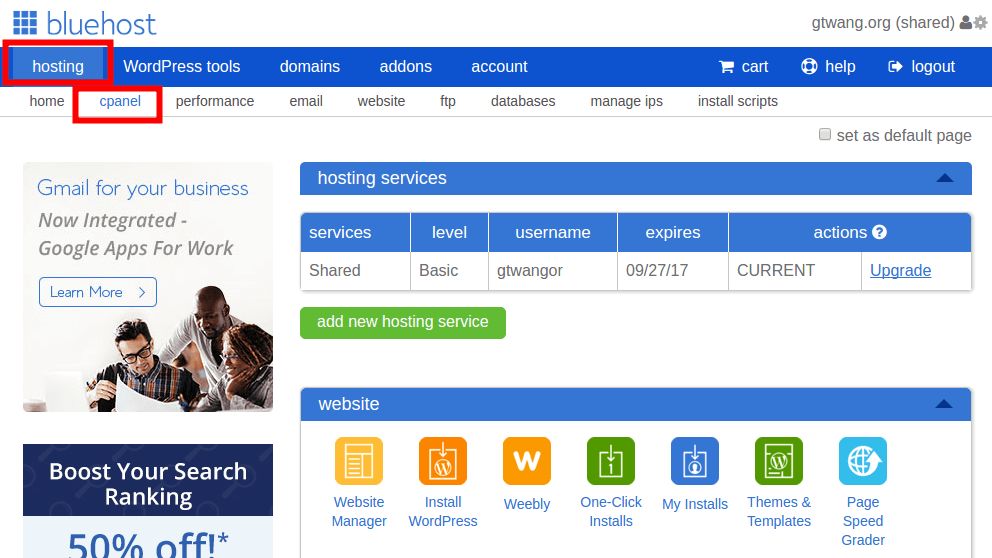
在「hosting」頁面中,選擇「cpanel」子頁面。
Step 2
在「security」的分類中,點選「SSH/Shell Access」。
Step 3
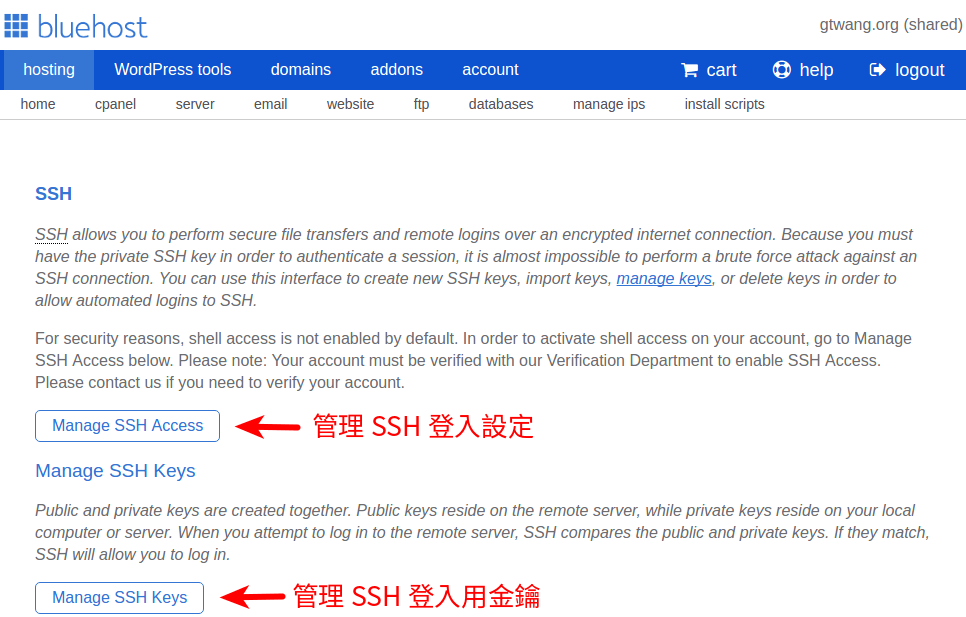
這個頁面中可以管理 SSH 登入的設定與金鑰,首先點選「Manage SSH Access」。
Step 4
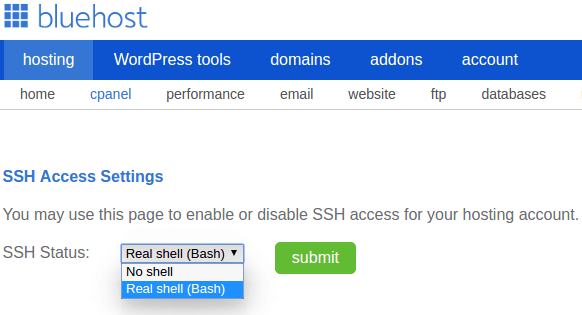
選擇「Real shell(Bash)」,並按下「submit」送出設定。
Step 5
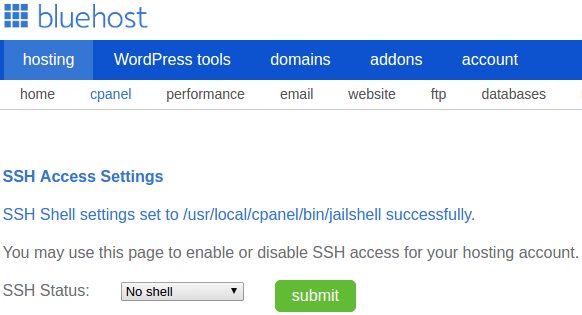
送出設定後,SSH Shell 會設定為 jailshell,這樣就可以直接使用自己的帳號與密碼透過 SSH 登入伺服器了。
Step 6
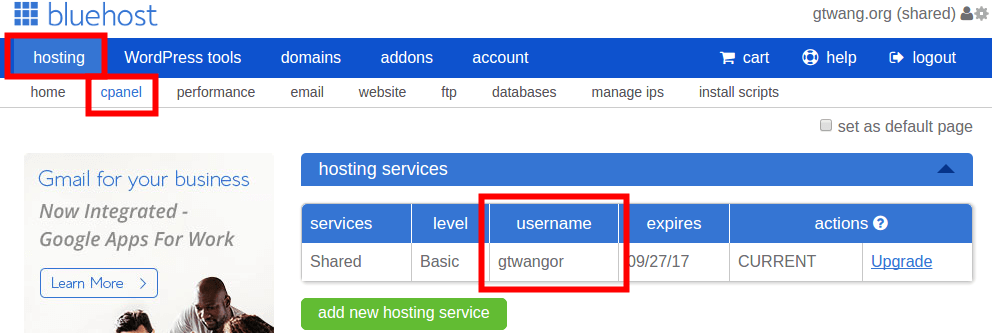
查詢自己的伺服器 IP 位址與登入的帳號名稱,帳號的名稱可以在「hosting」中的「cpanel」頁面查詢,頁面中的 username 就是登入用的帳號名稱,密碼就跟 Bluehost 網頁登入時用的密碼一樣。
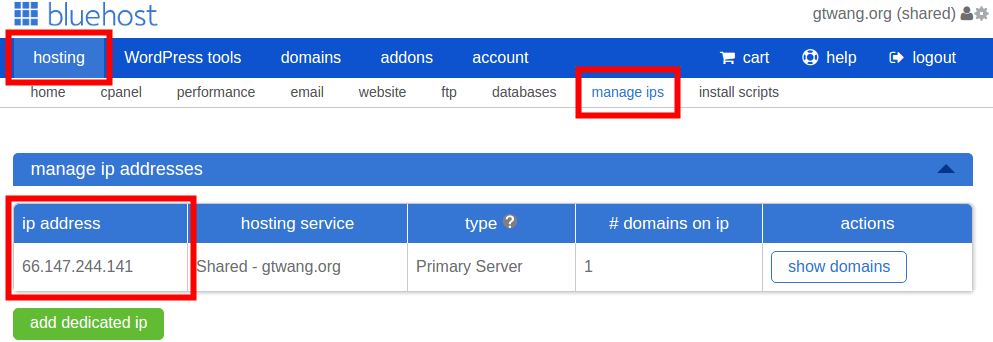
而伺服器的 IP 位址則可在「hosting」的「manage ips」頁面查到。
Step 7
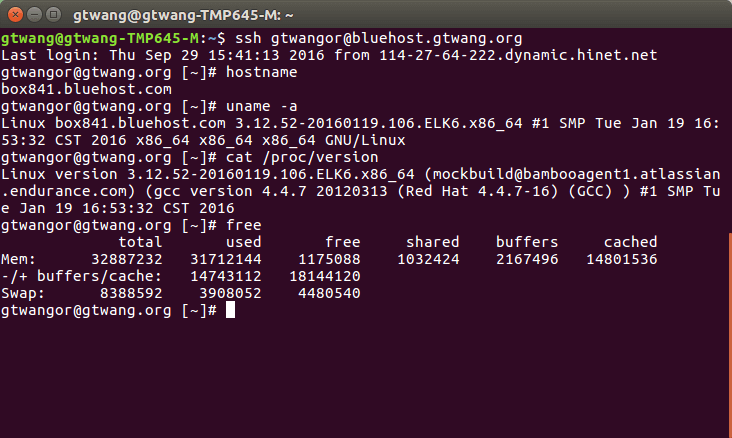
查到登入的主機與帳號之後,就可以直接使用 SSH 登入了,以我的例子來說就是執行:
ssh gtwangor@66.147.244.141
如果您之前在架設網站時有設定好 DNS(請參考 Bluehost 網頁主機空間基本設定與 WordPress 安裝教學),也可以使用設定好的網域名稱:
ssh gtwangor@bluehost.gtwang.org
匯入 SSH 登入用的公鑰
Step 1
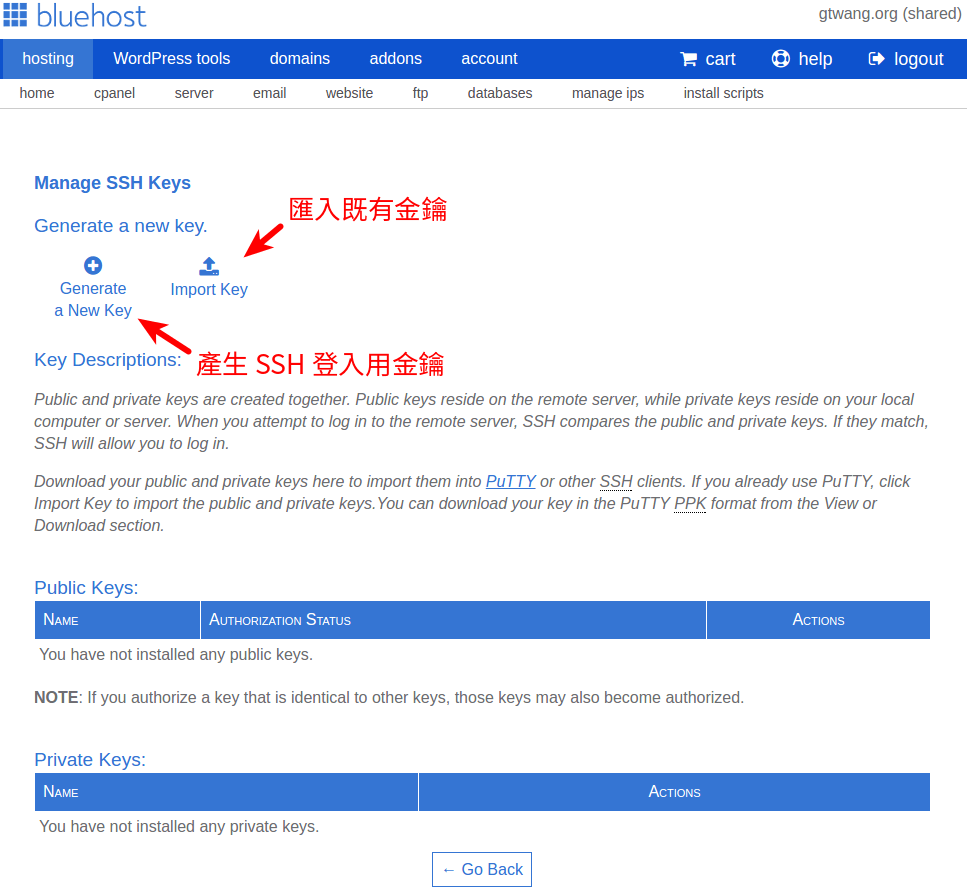
從上面的 SSH 管理介面頁面中,點選「Manage SSH Keys」後,就可以進入這個 SSH 金鑰管理頁面。
這裡可以讓使用者產生 SSH 登入用的金鑰,或是將既有的金鑰匯入。以下我示範將既有的金鑰匯入的操作方式。
Step 2
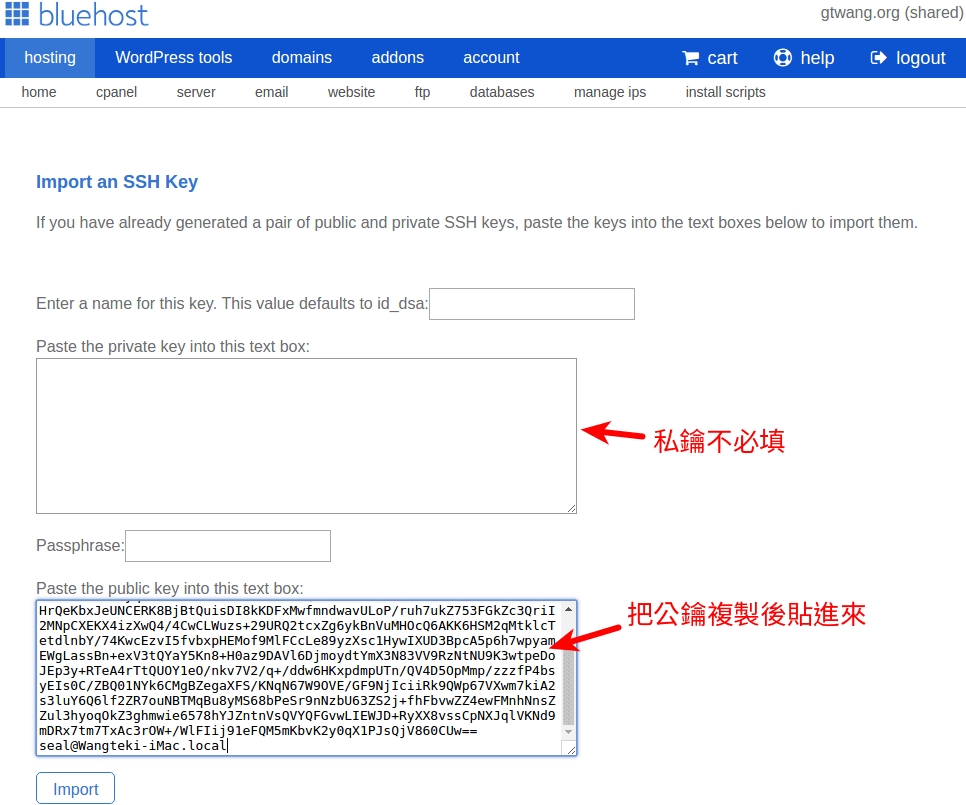
找出自己使用登入 SSH 用的金鑰,把公鑰的內容複製後貼在這個頁面中。若在 Linux 系統下的話,公鑰通常是放在 ~/.ssh/id_dsa.pub 這個檔案中,如果以前沒有使用過金鑰認證登入的人,可以參考 SSH 公開金鑰認證教學。
由於單純的主機登入只需要用到公鑰,所以上方私鑰的部分不需要填,只需要貼上公鑰即可,完成後按下「Import」匯入。
Step 3
回到上一頁管理 SSH 金鑰的頁面,這時候會看到剛匯入的公鑰,其狀態是呈現「not authorized」,表示這一支公鑰尚未被用來做為登入認證使用,請點選右方的「Manage Authorization」。
Step 4
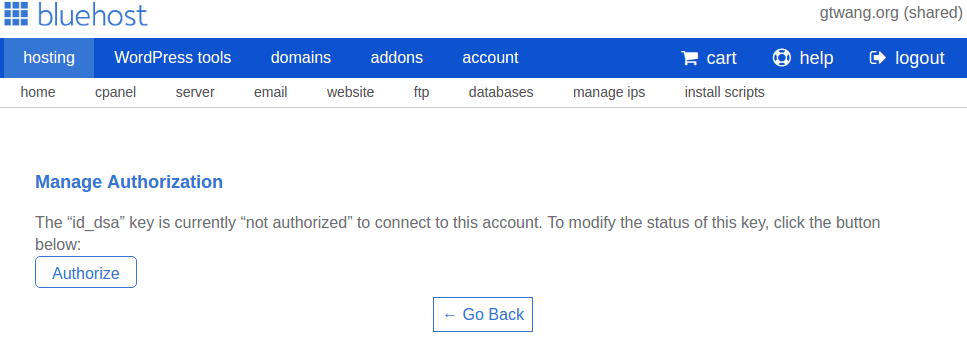
點選「Authorize」啟用這支公鑰的認證功能,這樣 SSH 的公鑰認證設定就完成了。
Step 5
使用公鑰認證的方式登入 SSH,正常來說現在登入主機就可以不需要打密碼了。
以上就是 Bluehost 的 SSH 登入與金鑰認證功能教學,對於架設網站有興趣的人可以參考網站架設的相關文章。




WOW
請問你是怎麼開通SSH? 要打電話給BLUEHOST?
G. T. Wang
就是按照網頁中的教學,預設就有了,不用開通。
WOW
但是我去SSH Access Settings
他說
—–
Before continuing, we need to verify your account. Please have the last four characters of your hosting password available.
Verification Department:
Monday – Friday: 8 AM – 9 PM (MST)
Saturday: 9 AM – 5 PM (MST)
Closed Sundays
U.S. (toll-free):
844-460-5819
International:
1-801-765-9400 (ext. 3)
—
G. T. Wang
我之前沒有碰過這個問題,我的經驗是註冊完就直接可以用 SSH 了。
不想花錢打國際電話的話,建議可以使用線上的 live chat 問客服,或是 create ticket 給客服,這兩個管道應該都可以立即獲得回應。
如果英文不夠好,可以先用中文寫完問題,再貼到 Google 翻譯轉成英文,通常英文不夠通順沒有什麼關係,客服還是可以處理。
pili
使用線上客服,會幫忙開通 2019.8.20