
這裡介紹 Bluehost 網頁主機空間的 FTP 帳號管理,以及如何使用 FTP 將檔案上傳至伺服器。
Bluehost 的 shared hosting 入門方案有提供非常完整的 FTP 帳號管理以及 TLS 安全加密連線功能,可非常方便且安全地管控多個 FTP 帳號的存取權限。以下是 FTP 帳號的管理與使用教學。
Step 1
在「hosting」頁面中,選擇「cpanel」子頁面。
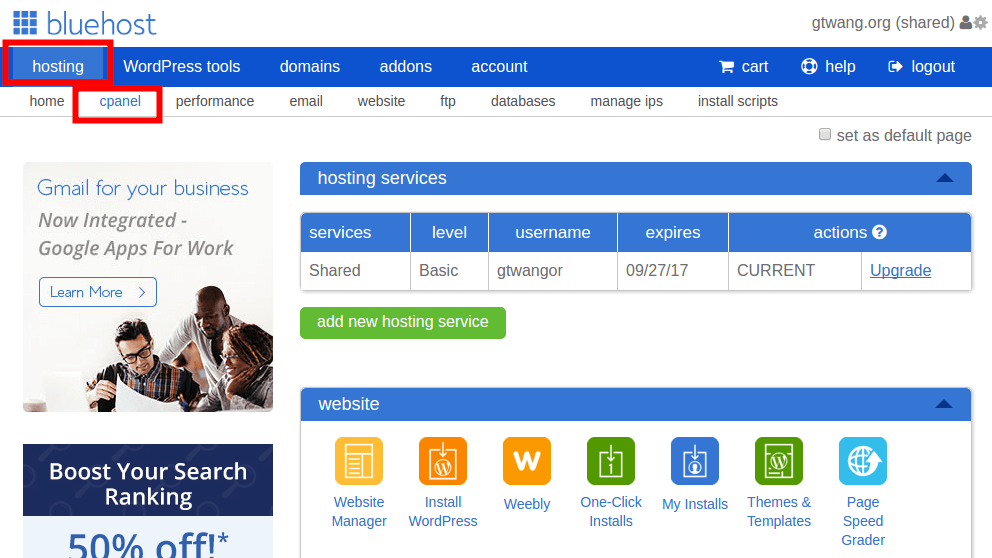
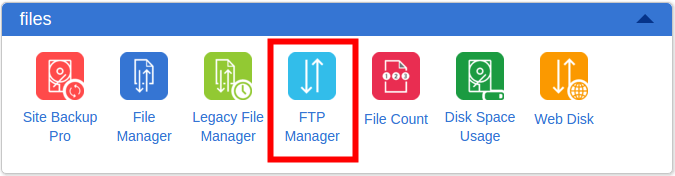
Step 2
在「files」選單中,選擇「FTP Manager」。
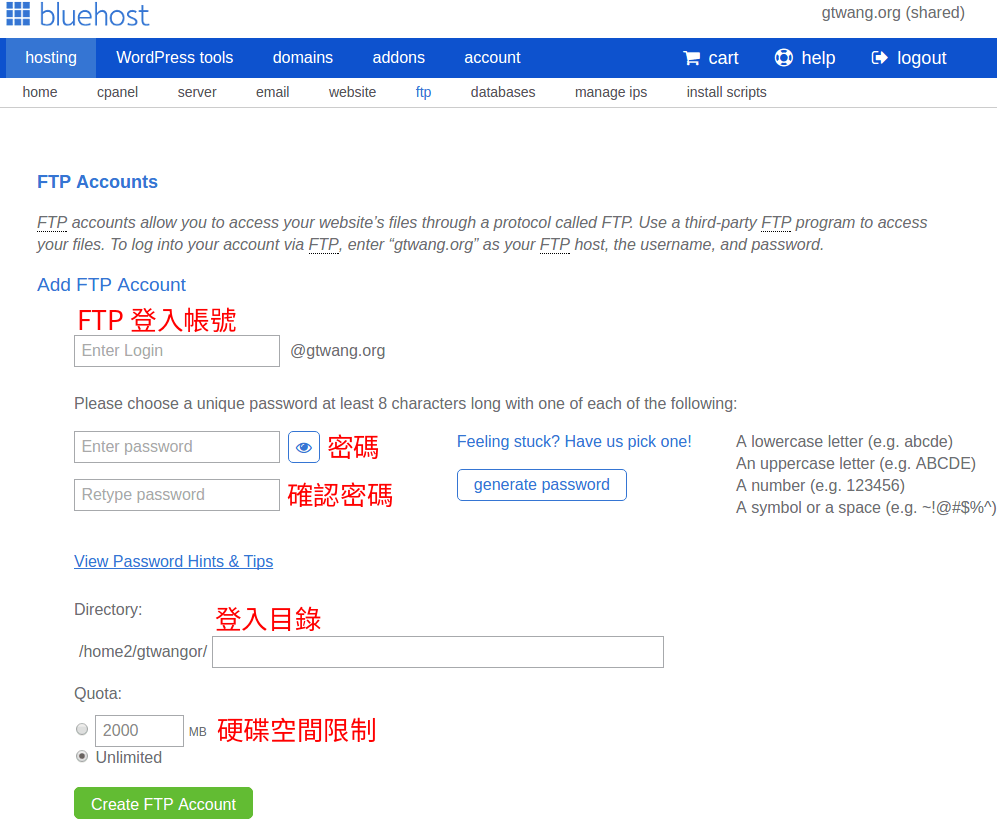
Step 3
建立一般使用者用的 FTP 帳號,並設定登入的密碼、目錄以及硬碟空間限制。
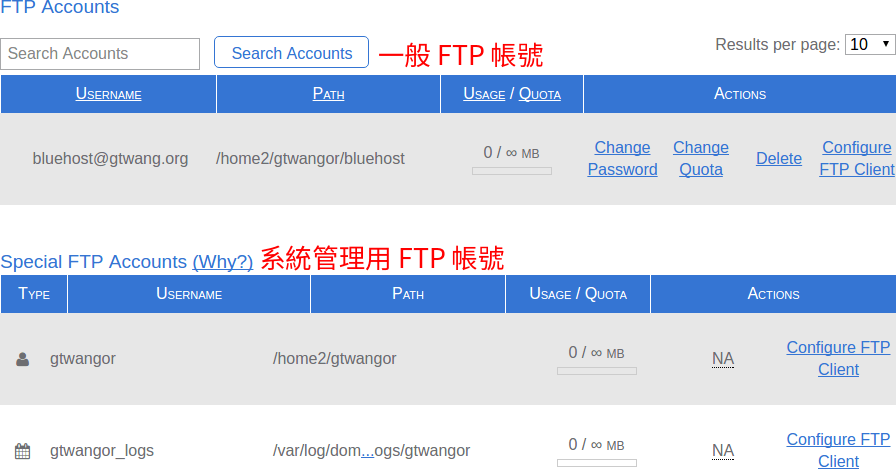
Step 4
在 FTP 帳號新增完成之後,在下方的帳號列表就可以看到新的帳號資訊。除了一般使用者的 FTP 帳號之外,下方還有兩個系統管理用的特殊帳號,這兩個帳號是用來管理所有的檔案以及系統記錄檔用的特殊帳號。
Step 5
查詢伺服器的 IP 位址,在「hosting」中的「manage ips」頁面中,將自己的伺服器 IP 位址複製下來。

Step 6
建立好 FTP 帳號,並且查到自己的伺服器 IP 之後,就可以開始使用 FTP 上傳檔案了。這裡我以 Linux 上面的 FileZilla 這套 FTP 軟體做示範,首先打開 FileZilla 軟體,連線的主機就填入上面查到伺服器 IP 位址,而使用者名稱與密碼則是剛剛上面建立的那一組,連接埠就填標準的 21,填好之後就可以立即連線了。
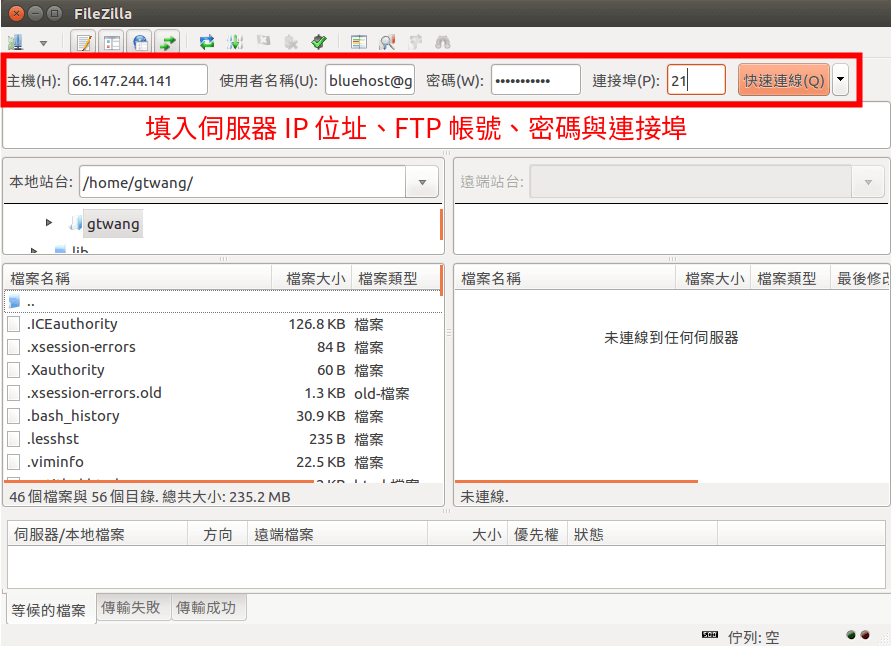
Step 7
Bluehost 的 FTP 伺服器是使用安全加密的 TLS 連線,所以建立連線時,會出現類似這樣的憑證確認訊息,請點選「確認」繼續。
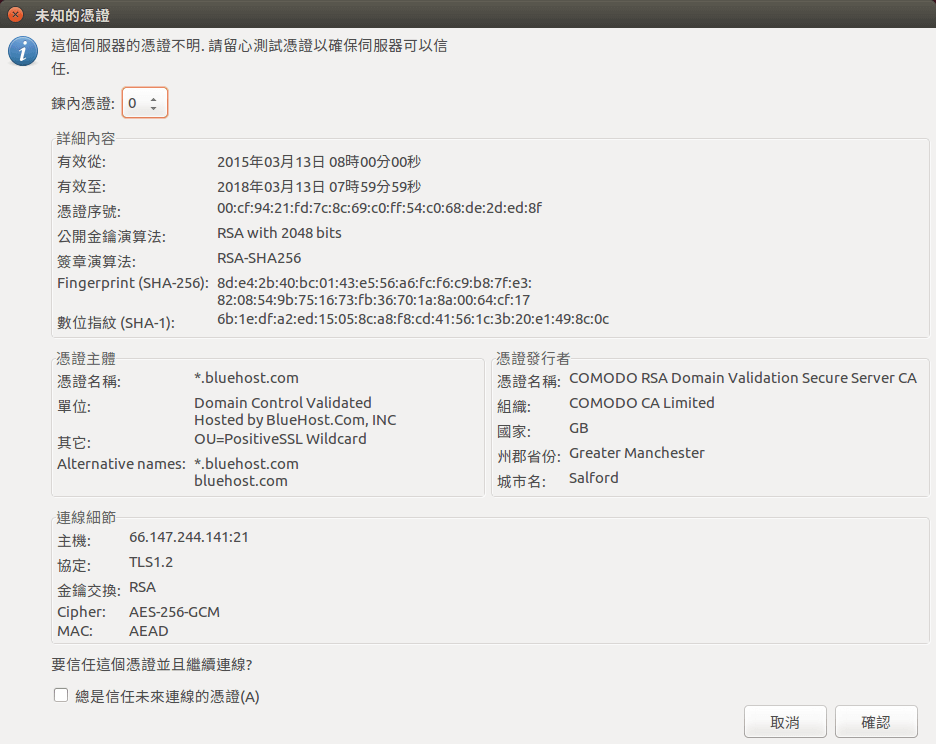
Step 8
FTP 連線建立之後,就可以開始傳送檔案了。
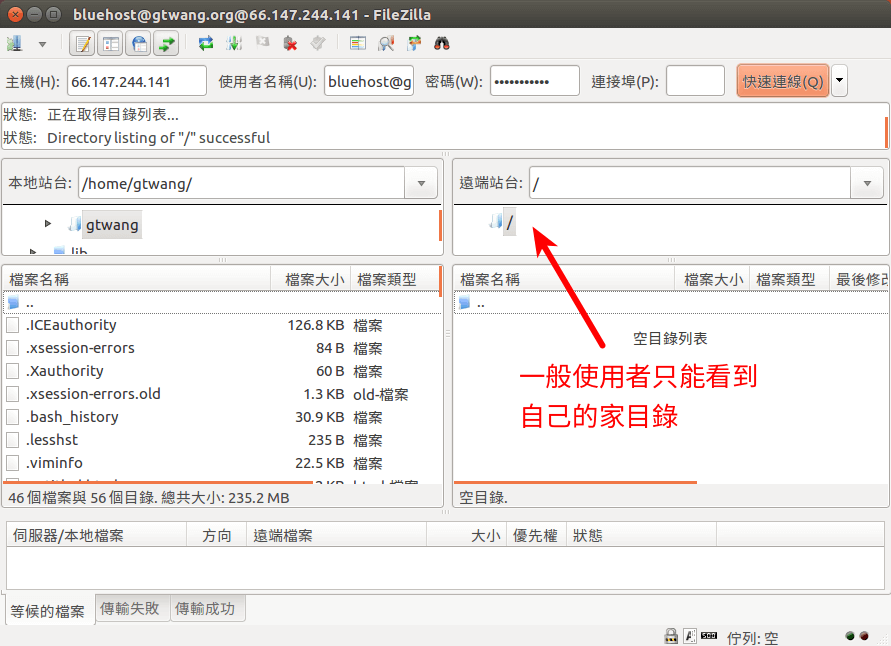
一般的 FTP 帳號連上伺服器之後,只能看到自己加目錄中的資料,也無法切換至伺服器上其他的目錄(也就是經過 chroot 之後的環境),這樣可以讓不同使用者獨立管理自己的檔案,不會互相干擾。
FileZilla 是一套開放原始碼且跨平台的 FTP 軟體,如果是 Windows 或是 Mac OS X 的使用者,也可以免費下載使用。而若是 Mac OS X 的使用者還可以考慮 Cyberduck。