這裡介紹如何將各種資料儲存為 TFRecords 檔案,方便在 TensorFlow 中使用。
TensorFlow 支援許多種讀取檔案的方式(例如 TensorFlow 輸入管線),而 TensorFlow 本身也有自己標準的 TFRecords 檔案格式,可以將資料與對應的資料標示(label)儲存在一起,方便在 TensorFlow 中使用。
在 TensorFlow 中最常見的資料應該就是圖片與對應的標示資訊,以下我們示範如何使用 Python 讀取圖片,連同標示資訊一起儲存至 TFRecords 檔案中。
Python 讀取圖檔
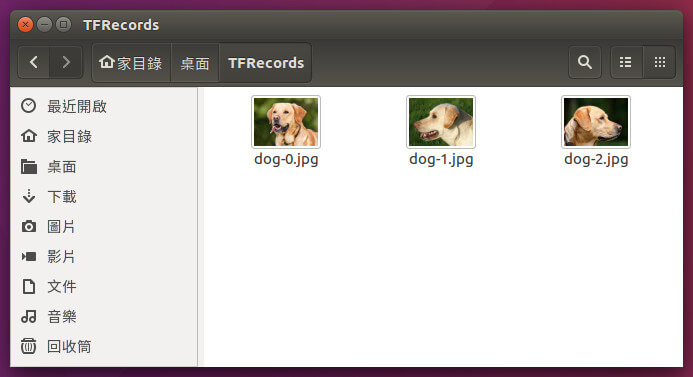
在將圖片存入 TFRecords 檔案之前,必須先以 Python 程式將圖片的資料讀取出來。假設我們有 3 張圖片,每張圖的大小為 640x480。
Python 讀取圖檔的方式有很多種,這裡我們以 numpy、skimage 與 matplotlib 這三個 Python 模組來處理圖檔的讀取以及顯示,在 Ubuntu Linux 中可以直接用 apt 安裝:
# Python 2.7
sudo apt-get install python-numpy python-skimage python-matplotlib

# Python 3.x
sudo apt-get install python3-numpy python3-skimage python3-matplotlib
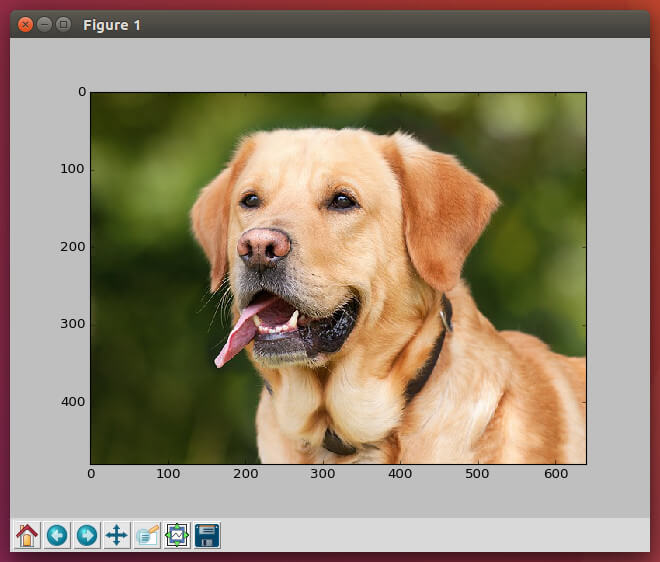
接著使用簡短的 Python 指令測試一下圖檔的讀取,並用 matplotlib 顯示圖形:
#!/usr/bin/python
# -*- coding: utf-8 -*-
import numpy as np
from skimage import io
from matplotlib import pyplot as plt

# 讀取 JPG 圖檔
dog_img = io.imread('dog-0.jpg')

# 顯示點陣圖
io.imshow(dog_img)
plt.show()
我們可以檢查一下圖形資料的大小:
# 檢查資料的維度
dog_img.shape
(480, 640, 3)
前兩個數字代表圖形的高度與寬度,而第三個 3 則是表示圖形有三個 channel(也就是 R、G、B)。
寫入 TFRecords 檔案
熟悉圖片資料的基本處理方式之後,接下來就要開始實際將資料寫入 TFRecords 檔案了。
以標準的作法來說,所有的資料都會先包裝成 Feature,然後將相關的 Features(例如圖片資料、標示等)組成一個 Example,最後再將所有的 Examples 存入 TFRecords 檔案中。
首先引入 tensorflow 模組,定義包裝 Feature 要用的一些基本小函數。
import tensorflow as tf

# 二進位資料
def _bytes_feature(value):
  return tf.train.Feature(bytes_list=tf.train.BytesList(value=[value]))

# 整數資料
def _int64_feature(value):
  return tf.train.Feature(int64_list=tf.train.Int64List(value=[value]))

# 浮點數資料
def _float32_feature(value):
  return tf.train.Feature(float_list=tf.train.FloatList(value=value))
以上分別是二進位資料、整數資料與浮點數資料的 Feature 包裝函數。
準備好要放進 TFRecods 的圖片與相關資料,這我們以一張圖配上一個浮點數的資料來作為示範。
# 圖片檔案名稱
image_filename_list = ['dog-0.jpg', 'dog-1.jpg', 'dog-2.jpg'];

# 標示資料
label_list = [1.0, 1.2, 0.6]
接著依據資料的類型,將資料包裝成 Feature、再組成 Example,然後寫入 TFRecords 檔案。
# TFRecords 檔案名稱
tfrecords_filename = 'dogs.tfrecords'

# 建立 TFRecordWriter
writer = tf.python_io.TFRecordWriter(tfrecords_filename)

for image_filename, label in zip(image_filename_list, label_list):
  # 圖取圖檔
  image = io.imread(image_filename)

  # 取得圖檔尺寸資訊
  height, width, depth = image.shape

  # 序列化資料
  image_string = image.tostring()

  # 建立包含多個 Features 的 Example
  example = tf.train.Example(features=tf.train.Features(feature={
      'height': _int64_feature(height),
      'width': _int64_feature(width),
      'image_string': _bytes_feature(image_string),
      'label': _float32_feature([label])}))

  writer.write(example.SerializeToString())

# 關閉 TFRecordWriter
writer.close()
由於圖片在經過序列化之後,會失去大小的資訊,所以這裡我們將圖片的大小資訊一起寫入 TFRecords 中,方便未來重建圖形時使用。
讀取 TFRecords 檔案
成功寫入 TFRecords 檔案之後,接著將其內容讀取出來檢查一下:
record_iterator = tf.python_io.tf_record_iterator(path=tfrecords_filename)

for string_record in record_iterator:
  # 建立 Example
  example = tf.train.Example()

  # 解析來自於 TFRecords 檔案的資料
  example.ParseFromString(string_record)

  # 取出 height 這個 Feature
  height = int(example.features.feature['height']
                               .int64_list
                               .value[0])

  # 取出 width 這個 Feature
  width = int(example.features.feature['width']
                              .int64_list
                              .value[0])

  # 取出 image_string 這個 Feature
  image_string = (example.features.feature['image_string']
                                .bytes_list
                                .value[0])

  # 取出 label 這個 Feature
  label = (example.features.feature['label']
                              .float_list
                              .value[0])

  image_1d = np.fromstring(image_string, dtype=np.uint8)
  image = image_1d.reshape((height, width, 3))

  # 這裡就可以使用從 TFRecords 讀取出來的 image 與 label 了

  # 顯示點陣圖
  # io.imshow(image)
  # plt.show()
TensorFlow 讀取 TFRecords 檔案
在建立好 TFRecords 檔案之後,最終的目的就是要在 TensorFlow 的程式中使用,以下是以 TensorFlow 讀取 TFRecords 資料的基本方式。
通常機器學習模型的輸入資料維度都是固定,如果圖片大小不一,會很難使用,所以這裡我們在讀取圖片時,加上一個自動標準化圖片大小的轉換步驟,讓所有的圖片在放進 TensorFlow 流程前都可以轉為同樣的大小。
#!/usr/bin/python
# -*- coding: utf-8 -*-
import numpy as np
from matplotlib import pyplot as plt
import tensorflow as tf
import skimage.io as io

# 圖片標準尺寸
IMAGE_HEIGHT = 240
IMAGE_WIDTH = 320

# TFRecords 檔案名稱
tfrecords_filename = 'dogs.tfrecords'

def read_and_decode(filename_queue):
  # 建立 TFRecordReader
  reader = tf.TFRecordReader()

  # 讀取 TFRecords 的資料
  _, serialized_example = reader.read(filename_queue)

  # 讀取一筆 Example
  features = tf.parse_single_example(
    serialized_example,
    features={
      'height': tf.FixedLenFeature([], tf.int64),
      'width': tf.FixedLenFeature([], tf.int64),
      'image_string': tf.FixedLenFeature([], tf.string),
      'label': tf.FixedLenFeature([], tf.float32)
      })

  # 將序列化的圖片轉為 uint8 的 tensor
  image = tf.decode_raw(features['image_string'], tf.uint8)

  # 將 label 的資料轉為 float32 的 tensor
  label = tf.cast(features['label'], tf.float32)

  # 將圖片的大小轉為 int32 的 tensor
  height = tf.cast(features['height'], tf.int32)
  width = tf.cast(features['width'], tf.int32)

  # 將圖片調整成正確的尺寸
  image = tf.reshape(image, [height, width, 3])

  # 這裡可以進行其他的圖形轉換處理 ...
  # ...

  # 圖片的標準尺寸
  image_size_const = tf.constant((IMAGE_HEIGHT, IMAGE_WIDTH, 3), dtype=tf.int32)

  # 將圖片調整為標準尺寸
  resized_image = tf.image.resize_image_with_crop_or_pad(image=image,
    target_height=IMAGE_HEIGHT,
    target_width=IMAGE_WIDTH)

  # 打散資料順序
  images, labels = tf.train.shuffle_batch(
    [resized_image, label],
    batch_size=2,
    capacity=30,
    num_threads=1,
    min_after_dequeue=10)

  return images, labels
以這個 read_and_decode 就是讀取資料用的函數,接著就可以開始使用在 TensorFlow 中讀取資料了:
# 建立檔名佇列
filename_queue = tf.train.string_input_producer(
  [tfrecords_filename], num_epochs=10)

# 讀取並解析 TFRecords 的資料
images, labels = read_and_decode(filename_queue)

# 初始化變數
init_op = tf.group(tf.global_variables_initializer(),
                   tf.local_variables_initializer())

with tf.Session()  as sess:
  # 初始化
  sess.run(init_op)

  coord = tf.train.Coordinator()
  threads = tf.train.start_queue_runners(coord=coord)

  # 示範用的簡單迴圈
  for i in range(3):

    img, lab = sess.run([images, labels])

    # 檢查每個 batch 的圖片維度
    print(img.shape)

    # 顯示每個 batch 的第一張圖
    io.imshow(img[0, :, :, :])
    plt.show()

  coord.request_stop()
  coord.join(threads)
以上就是 TFRecords 檔案格式的基本使用方式。
TFRecords 壓縮檔案
TFRecords 本身就有支援資料壓縮的功能,只要在建立 TFRecords 檔案時加上壓縮參數即可:
# 設定以 gzip 壓縮
compression = tf.python_io.TFRecordCompressionType.GZIP

# 建立 TFRecordWriter
writer = tf.python_io.TFRecordWriter(tfrecords_filename,
  options=tf.python_io.TFRecordOptions(compression))
而經過壓縮的 TFRecords 檔案,在讀取時也要使用對應的壓縮參數:
# 讀取 gzip 壓縮的 TFRecords 檔案
record_iterator = tf.python_io.tf_record_iterator(path=tfrecords_filename,
  options=tf.python_io.TFRecordOptions(compression))
在 TensorFlow 中讀取壓縮的 TFRecords 檔案時,也同樣要加上壓縮的參數:
# 建立 TFRecordReader
reader = tf.TFRecordReader(
  options=tf.python_io.TFRecordOptions(compression))