Step 4
用 apt 安裝 PHP-FPM:
sudo apt-get install php5-fpm
Step 5
設定 NGINX 伺服器,開啟 /etc/nginx/sites-available/default 這個設定檔,找到這一段:
# Add index.php to the list if you are using PHP
index index.html index.htm index.nginx-debian.html;
加入 index.php,修改成這樣:
# Add index.php to the list if you are using PHP
index index.php index.html index.htm index.nginx-debian.html;
Step 6
同樣在 /etc/nginx/sites-available/default 這個設定檔,找到這一段:
# pass the PHP scripts to FastCGI server listening on 127.0.0.1:9000
#
#location ~ .php$ {
#       include snippets/fastcgi-php.conf;
#
#       # With php5-cgi alone:
#       fastcgi_pass 127.0.0.1:9000;
#       # With php5-fpm:
#       fastcgi_pass unix:/var/run/php5-fpm.sock;
#}
把這一段的註解拿掉,而 fastcgi_pass 的部分則選擇 php5-fpm 的設定,php5-cgi 的版本要註解起來,變成這樣:
# pass the PHP scripts to FastCGI server listening on 127.0.0.1:9000

location ~ .php$ {
       include snippets/fastcgi-php.conf;

       # With php5-cgi alone:
       # fastcgi_pass 127.0.0.1:9000;
       # With php5-fpm:
       fastcgi_pass unix:/var/run/php5-fpm.sock;
}
Step 7
讓 NGINX 重新設定檔:
sudo service nginx reload
Step 8
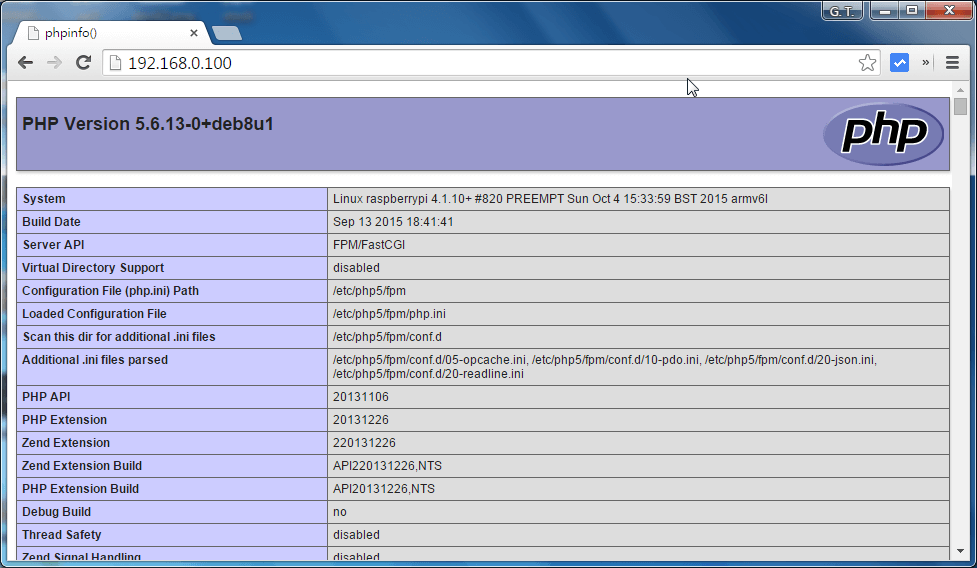
NGINX 預設的網頁放置位置是 /var/www/html,在這個位置新增一個測試的 index.php 網頁,內容如下:
<?php echo phpinfo(); ?>
Step 9
打開瀏覽器,輸入 Raspberry Pi 的位址,正常的話應該就可以看到 PHP 的相關資訊了。
繼續閱讀: 12


1 則自動引用通知