
介紹如何在 Python 中使用 CRAFT 演算法偵測圖片中彎曲的文字。
安裝 craft-text-detector 模組
CRAFT 是一個以深度學習為基礎的文字偵測方法,而作者也將相關的 PyTorch 程式碼放在 GitHub 網站上。
craft-text-detector 則是另外一個包裝成獨立 Python 模組的 CRAFT,功能相同但使用上較為方便,我們可以使用 pip 來安裝 craft-text-detector:
# 安裝 craft-text-detector
pip install craft-text-detector
基本 CRAFT 偵測文字
CRAFT 的特點是除了偵測一般的文字之外,他還可以處裡彎曲的文字。我們以這張圖片作為範例,是反如何使用 CRAFT 偵測其中的文字。
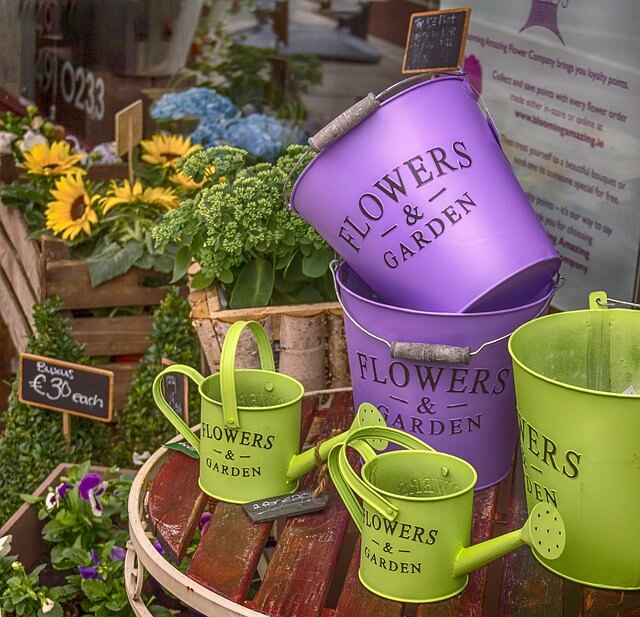
首先引入 Craft 類別,並指定輸入影像與輸出目錄,輸入的影像可以指定為檔案路徑、PIL 影像或 NumPy 陣列。
# 引入 Craft 類別
from craft_text_detector import Craft

# 指定輸入影像(可為檔案路徑、PIL 影像或 NumPy 陣列)
image = 'flower-shop.jpg' # can be filepath, PIL image or numpy array

# 指定輸出目錄
output_dir = 'output/'
建立 Craft 物件,並以 crop_type 參數指定圈選類型(poly 代表多邊形,box 代表方形):
# 建立 Craft 物件
craft = Craft(
    output_dir=output_dir, # 輸出目錄
    crop_type="poly",      # 圈選類型(可為 "poly" 或 "box")
    cuda=True              # 使用 GPU 運算
)
以 Craft 進行文字偵測,並將結果輸出至輸出目錄:
# 以 Craft 進行文字偵測,並將結果輸出至輸出目錄
prediction_result = craft.detect_text(image)
最後將模型從記憶體中卸載:
# 卸載模型(從記憶體中移除)
craft.unload_craftnet_model()
craft.unload_refinenet_model()
在 prediction_result 中包含了文字偵測的一些結果,裡面有文字區塊座標等資訊,如果要在 Python 中繼續對這些偵測結果做進一步處理,就可以從這裏面取得資料:
# 各種偵測結果
print(prediction_result.keys())
dict_keys(['boxes', 'boxes_as_ratios', 'polys', 'polys_as_ratios', 'heatmaps', 'times', 'text_crop_paths'])
例如取得第一個文字區塊的多邊形座標:
# 第一個文字區塊座標
print(prediction_result['polys'][0])
[[487.58318085  37.00935308]
 [506.33959372  42.90818262]
 [532.02744403  48.79826848]
 [554.07196535  57.59426963]
 [579.70987426  65.48378544]
 [610.31355643  74.89937926]
 [629.10584238  80.68162094]
 [625.79365025  91.37400273]
 [607.0013643   85.59176105]
 [576.61588316  76.24145896]
 [550.79418554  68.29725008]
 [528.23196621  59.32963939]
 [503.2309895   53.66162472]
 [484.47457663  47.76279518]]
除了 prediction_result 中儲存的資訊之外,Craft 會將所有的偵測結果放在指定的輸出目錄中,以下是預設會輸出的資訊。
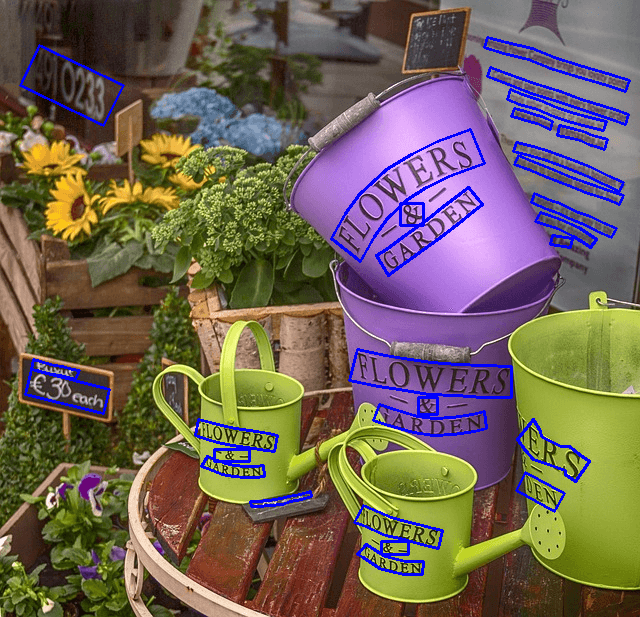
輸出的檔案名稱會以輸入的影像檔名作為前綴,輸入檔名_text_detection.png 是文字偵測的結果,裡面會框出所有偵測到的文字:
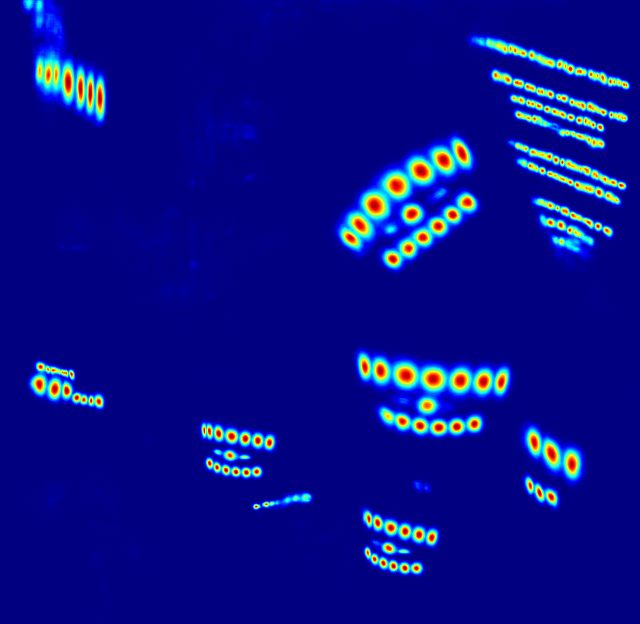
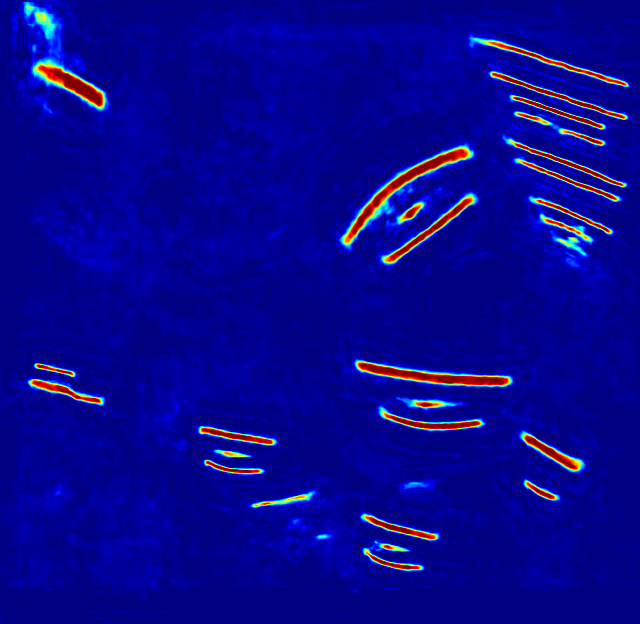
而 輸入檔名_text_score_heatmap.png 與 輸入檔名_link_score_heatmap.png 則分別為文字偵測與連結的熱圖(heat map)。
輸入檔名_text_detection.txt 這個文字檔案中,包含了偵測到的文字區塊(多邊形或方形)座標,其格式為一個區塊一行,每一行的內容就是 x1,y1,x2,y2,... 這樣的座標資訊:
487,37,506,42,532,48,554,57,579,65,610,74,629,80,625,91,607,85,576,76,550,68,528,59,503,53,484,47
39,45,123,85,103,125,20,85
490,67,506,73,534,83,560,91,581,99,614,109,628,114,625,124,611,119,578,108,557,101,531,93,503,82,487,76
510,89,522,94,540,100,556,107,571,112,589,117,606,121,603,130,586,126,568,121,553,116,537,109,519,104,507,99
[略]
而 輸入檔名_crops 目錄中則包含每一個文字區塊的圖片,以下是其中一張:
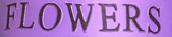
當文字區塊抓出來之後,可以再使用 Tesseract OCR 等工具進行文字辨識。
進階範例
以下是一個進階的範例,含有較多的自訂選項參數:
# 引入 craft 相關函數
from craft_text_detector import (
    read_image,
    load_craftnet_model,
    load_refinenet_model,
    get_prediction,
    export_detected_regions,
    export_extra_results,
    empty_cuda_cache
)

# 指定輸入影像(可為檔案路徑、PIL 影像或 NumPy 陣列)
image = 'flower-shop.jpg' # can be filepath, PIL image or numpy array

# 指定輸出目錄
output_dir = 'output/'

# 讀取影像
image = read_image(image)

# 載入模型
refine_net = load_refinenet_model(cuda=True)
craft_net = load_craftnet_model(cuda=True)

# 進行預測
prediction_result = get_prediction(
    image=image,
    craft_net=craft_net,
    refine_net=refine_net,
    text_threshold=0.7, # 文字偵測門檻
    link_threshold=0.4, # 連結偵測門檻
    low_text=0.4,
    cuda=True,
    long_size=1280
)

# 匯出偵測到的文字區塊
exported_file_paths = export_detected_regions(
    image=image,
    regions=prediction_result["boxes"],
    output_dir=output_dir,
    rectify=True
)

# 匯出熱圖、偵測座標點與偵測結果圖
export_extra_results(
    image=image,
    regions=prediction_result["boxes"],
    heatmaps=prediction_result["heatmaps"],
    output_dir=output_dir
)

# 將模型從 GPU 卸載
empty_cuda_cache()
常見問題
若在執行時出現以下錯誤訊息:
ImportError: libGL.so.1: cannot open shared object file: No such file or directory
表示 libGL 函式庫沒有安裝,若在 Ubuntu Linux 中可以透過 apt 安裝:
# 安裝 libGL 函式庫
sudo apt install libgl1